Integration testing with Virtual Join flows
If you're building a UI that will use Derapi Join, you may want to perform integration testing without the need to find or generate enrollments for real test devices. In order to support this use case, Derapi Join allows for the creation of Virtual Join Flows, which allow you to simulate the end-to-end process of device enrollment within a Derapi Virtual Mode sandbox.
This guide will explain how to use Derapi Join with Virtual Mode credentials to achieve this.
Prerequisites
In order to get started, you'll need:
- Derapi Virtual Mode credentials
- A virtual Program to target. Currently, Derapi will create virtual Programs on your behalf per a request to [email protected].
- A redirect URI that you'd like to redirect clients to once your virtual Join Flow is successfully completed
Identifying a target Program
Like real Join Flows, virtual Join Flows can optionally be associated with a target Program, resulting in enrollments into that Program when authorizations are completed successfully. In this guide, we'll be creating a Virtual Join flow that is associated with a virtual Program.
You can use the List Programs endpoint to find a virtual Program ID from your Virtual Mode account, like this:
$ curl -H "Authorization: apikey $VIRTUAL_KEY" https://api.derapi.com/programs | jq .
{
  "programs": [
    {
      "end": "2045-01-22T18:57:49.51Z",
      "id": "prog-xi6n4thizmo44orn",
      "name": "Virtual Program",
      "resourceTypes": [
        "batterysystem"
      ],
      "start": "2025-01-27T18:57:49.51Z",
      "vendors": [
        "virtual"
      ]
    }
  ]
}
Creating a virtual Join Flow
Having identified a virtual Program ID to use, we can now create a virtual Join Flow that references it:
$ curl \
  -X POST \
  -H 'content-type: application/json' \
  -H "Authorization: apikey $VIRTUAL_KEY" \
  https://api.derapi.com/join/flows \
  --data '{"redirectURI":"https://myprogram.com/auth-success.html","programID":"prog-xi6n4thizmo44orn","vendors":[{"vendor":"virtual"}]}'
This will return us a Flow ID, like flow-ufefnrx2bgnogkiu, which we can now use to initiate virtual authorization sessions.
Starting a virtual authorization session
You can initiate a virtual authorization session using our create Join session endpoint, with a URL like this:
https://api.derapi.com/join/flows/{flowID}/authorize?vendor=virtualUpon visiting that URL in a browser, you'll be redirected to a virtual vendor authorization page, which will look something like this:
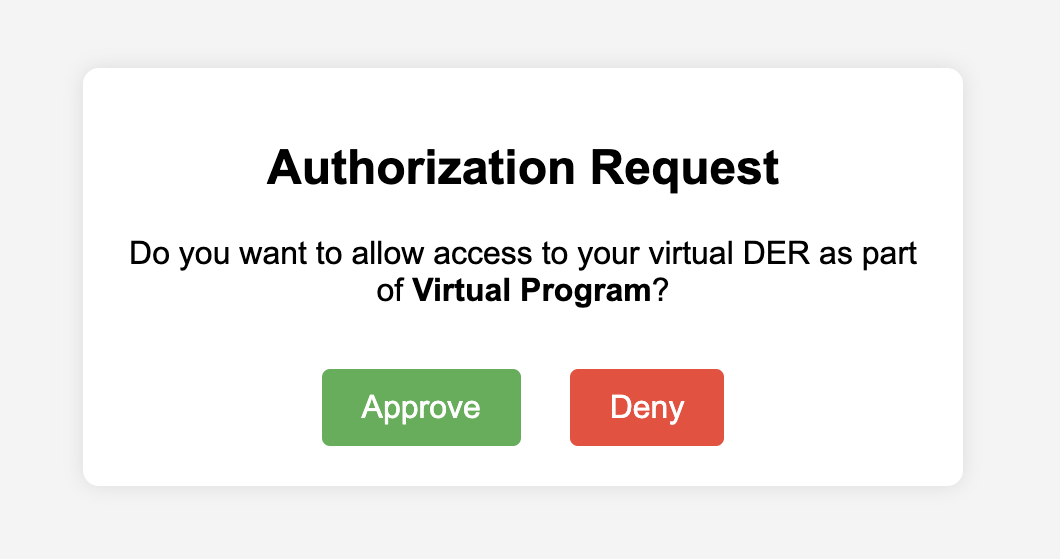
Upon pressing 'Approve', your browser will be redirected back to the redirectURI associated with your virtual flow. If you provided a state query string parameter on the initial /join/flows/{flowID}/authorize request, it will be included as a query string parameter. Also, since we attached a programID to our flow, a new enrollment will be generated, and its ID provided in the enrollmentID query string parameter.
Looking up the generated enrollment and site
You can now use the generated enrollment ID to look up the virtual enrollment within the Derapi API:
$ curl -H "Authorization: apikey $VIRTUAL_KEY" https://api.derapi.com/enrollments/enrl-aczxvvs3fzjrvi3q | jq .
{
  "history": [],
  "id": "enrl-aczxvvs3fzjrvi3q",
  "programID": "prog-xi6n4thizmo44orn",
  "siteID": "site-oiynplookvy2nkxn",
  "status": "pending"
}
You can also fetch the associated virtual site using our get site API, and modify it like you would any virtual site.
Updated 8 months ago